Why Small Windshield Chips Turn Into Large Cracks
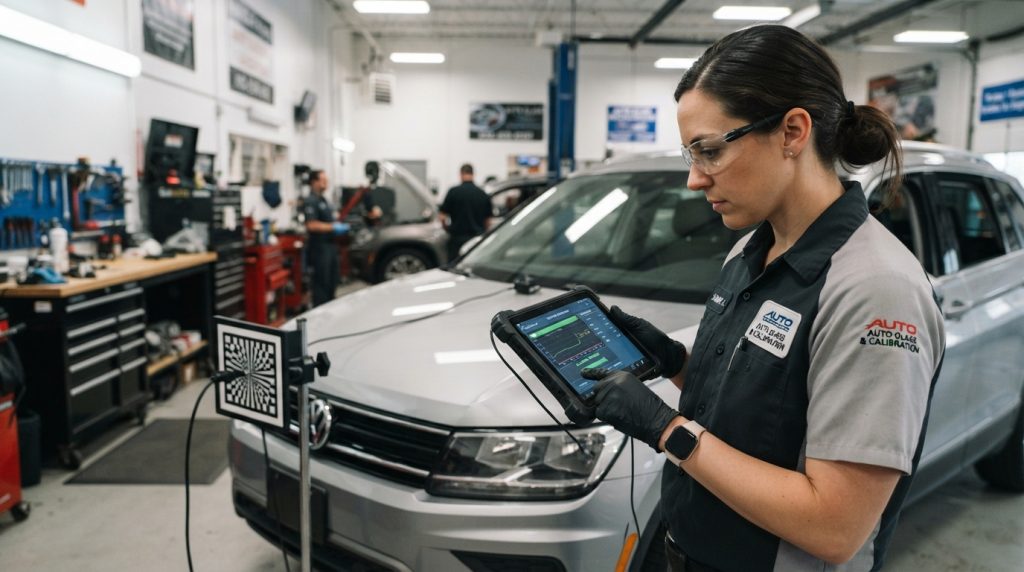
A windshield replacement or collision repair can leave you wondering whether a separate ADAS calibration charge belongs on the estimate. The total depends on your vehicle and the work it needs, so one headline price may not fit your repair.
Your estimate should connect the equipment, required procedure, and any extra repair work. Those details help you judge whether the price matches the job and whether insurance may apply. The right repair also matters for your vehicle’s safety.
Dynamic calibration is a manufacturer-specified procedure performed while driving and initiated through diagnostic equipment. Other jobs use stationary targets, and some need both methods.
Key Takeaways
- Vehicle design and repair scope shape the total cost.
- A calibration price should name the system and required procedure.
- Separate repair work may add charges beyond calibration.
- Insurance payment depends on your policy and claim.
- Start with a useful range, then match the scope to your vehicle.
A useful starting range can help you review a quote, but the final scope must match your vehicle.
What Is a Typical ADAS Calibration Cost?
A useful starting point is roughly $250-$450 for the listed individual calibration categories, before confirming the vehicle and exact procedure. That range is a benchmark, not a promise of your final price.
The system and work scope determine what a quote should include. A radar calibration and a camera procedure may need different equipment, steps, and labor.
Reported price ranges by system
These reported ranges can help you compare an estimate with common service categories. Ask the shop to name the operation that applies to your vehicle.
| Service category | Reported price range | Scope reminder |
|---|---|---|
| Radar calibration | $300-$400 | Confirm the required operation |
| Blind spot monitor calibration | $300-$400 | Confirm the required operation |
| Backup camera or backup sensor calibration | $250-$300 | Identify which hardware applies |
| Lane keep assist or lane departure warning calibration | $300-$400 | Confirm the required operation |
| 360-degree or all-view monitor calibration | $350-$450 | Confirm the required operation |
What a benchmark does and does not include
A broad estimate places average calibration cost at $350-$500. Dealership pricing often starts around $400-$500 or higher.
Neither figure guarantees the total for your repair. A quote may cover one operation, while another may include more systems, extra labor, or other repair work.
AAA’s December 2023 study examined a 2023 Ford F-150, Nissan Rogue, and Toyota Camry. Its windshield scenario listed a $360 ADAS portion for transferring windshield-related components and required calibration.
The full repair scenario totaled $1,439.78. It did not include replacement of the windshield-mounted camera, so that amount was not a calibration-only price.
A 2021 ADAS calibration cost is not a reliable substitute for a current quote. Vehicle requirements and the specific repair still shape the scope.
Use these figures as comparison points, then look at the vehicle-specific factors that can shift the amount.
Which Vehicle and Procedure Factors Change the Price?
Two vehicles with the same dashboard feature can require different equipment and calibration steps. The visible feature does not tell you which sensors or procedure the vehicle uses.
Vehicle design, OEM procedure, and shop setup all affect the quote. A similar repair can take different tools and technician time across domestic, Asian, and European models.
Hardware, vehicle design, and OEM requirements
A system may rely on a camera, radar, or several sensors working together. More hardware can mean added setup or steps, but feature names alone do not show the full system.
The manufacturer-required calibration instructions, or OEM procedure, set the needed steps and tolerances. Small differences in vehicle design can change target placement, measurement points, and software needs.
That is why a shop should identify the affected hardware and the exact operation. A general price for a feature may not match your vehicle’s requirements.
Static, dynamic, or combined procedures
A static calibration uses targets or reflectors while the vehicle stays in a measured position. The technician may need to set the vehicle level and place each target at a precise distance and angle.
Dynamic calibration is a manufacturer-specified calibration procedure performed while driving and initiated through diagnostic equipment. The drive follows steps set for the vehicle, rather than a general road test.
Some applications require both static and dynamic procedures. The added operation can affect labor and appointment planning, so ask which method the estimate includes.
Shop setup, equipment, and technician time
A static procedure may need a controlled space with enough room around the vehicle. Targets, measurement tools, and diagnostic software help technicians follow the OEM procedure.
Shops also maintain equipment and pay for training and technician labor. These costs can shape pricing even when two estimates list the same calibration name.
Once you know why procedures differ, the next question is which repair events can make one necessary.
When Might Your Vehicle Need Calibration?
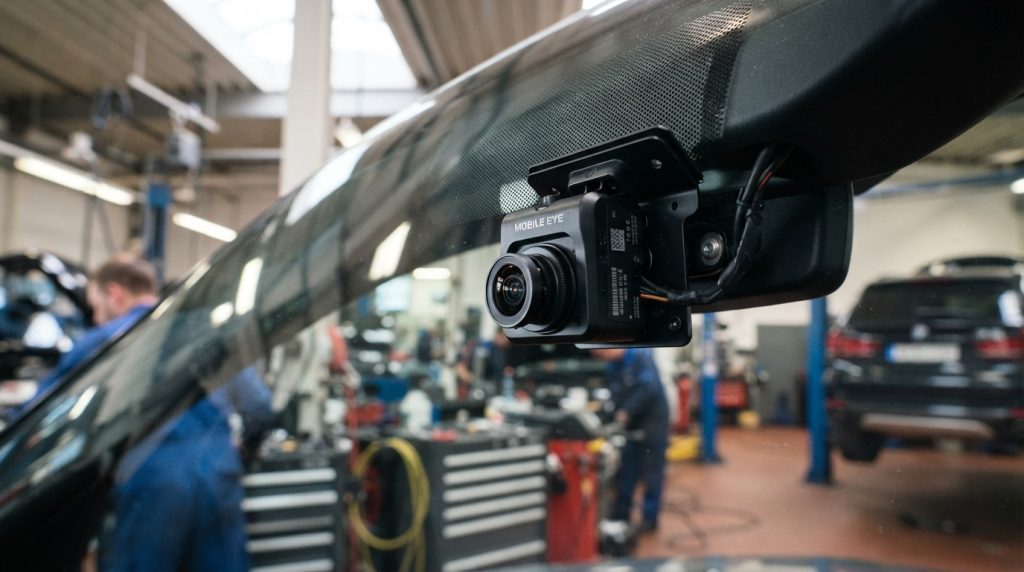
A windshield replacement is one familiar event that can affect a camera mounted near the glass. Sensor position matters because a small change can affect what the system detects.
The applicable OEM procedure determines whether a repair needs calibration. The same type of work may affect one vehicle’s system but not another’s.
Windshield and sensor work
Work near a camera or radar can change its position, view, or mounting. A replacement glass part may also affect the camera’s position or visibility, depending on the vehicle design.
Possible calibration triggers include:
- Windshield replacement
- Camera or radar removal
- Front- or rear-end collision repair
- Bumper repair involving radar units
- Alignment, suspension work, or module programming that affects ADAS
These events are reasons to check the required procedure, not proof that every vehicle needs the same work. The shop should match the repair event to the vehicle-specific instructions.
Collision and mechanical repair events
A collision can shift a sensor bracket, bumper, or other part that helps a system read the road. Mechanical repairs may also change vehicle angles or system settings.
A warning light is not the only sign that a system needs attention. A lack of warning does not prove that sensor position is correct. Some required procedures follow the repair itself, even when the dashboard appears normal.
For example, a driver may see no alert after a windshield camera has been removed and fitted again. The vehicle’s OEM procedure, not the warning light alone, determines the next step.
Once a repair event raises the question, the shop must explain what it does to complete and verify the work.
What Does an ADAS Calibration Include?
A scan can reveal diagnostic information, but it does not by itself prove that a camera or radar is correctly aimed. Scanning and calibration answer different questions.
A complete job follows the required procedure and checks the result. The work may include inspection, setup, calibration, and separate checks before and after the procedure.
Scan and identify the required operation
A pre-scan checks module status and records diagnostic information before work begins. The shop uses the vehicle details and repair event to identify the system and the needed operation.
Technicians may check the sensor and its mounting area for damage or debris. They may clean the area or confirm that the sensor sits as intended before starting.
A diagnostic scan is not a calibration. The scan reads system status, while calibration aims or configures an identified system as the OEM procedure requires.
Prepare the vehicle and perform the procedure
Some jobs call for measurements of the vehicle and target positions. Technicians may need a level, controlled setup before placing targets or reflectors.
The shop then completes the required static procedure, dynamic procedure, or both. The procedure can depend on the system, not simply on the name of a dashboard feature.
A fault may not produce a warning light. No warning light or fault code alone proves that the sensor is aimed correctly.
Verify and document the result
A post-scan records the system’s diagnostic status after work. Procedure-based verification checks whether the required calibration steps were completed, so the two checks provide different information.
Ask the shop for the results and for a record of the procedure performed. Those details help you understand whether the work matched the vehicle’s requirements.
Do not test automatic braking or lane intervention in traffic. Those safety systems should not be tested through risky driving.
Clear records can help you and your insurer understand what the shop performed and charged.
Does Insurance Cover ADAS Calibration?
A calibration may be required for the repair without being automatically approved for payment under every policy. Coverage and repair need are separate questions.
Your policy, claim, deductible, and authorization affect payment. Contact your insurer before assuming it will cover a calibration or related service.
Confirm coverage and authorization for your claim
An OEM-required operation may be part of completing a repair, but the insurer makes a separate payment decision. Ask whether your claim covers the work and whether the shop needs approval first.
Explain the repair event and ask what information the insurer needs to review the charge. If the shop finds extra work, ask whether the estimate needs an update before the work proceeds.
Keep a record of insurer discussions, including the date, the person you spoke with, and any approval details. Early communication can help avoid confusion about unusual setup needs or extended work.
Keep records that explain the work
Useful documentation links the repair to the required operation and the final result. Retain the records listed below, along with timestamps and technician certification information when available.
| Record | What it helps establish | What to retain |
|---|---|---|
| Pre-scan | Initial system status | Scan results and date |
| OEM procedure reference | Required operation | Procedure name or reference |
| Setup and completion photos | Vehicle and target arrangement | Photos before and after work |
| Post-scan | Final diagnostic status | Results and date |
| Itemized invoice | Work and charges performed | Each service and price |
Keep the estimate, approvals, and final invoice together. If the shop expects extra work, ask for the reason and price before authorizing it.
With coverage questions clear, you can compare estimates and check for overlapping line items.
How Can You Compare Quotes and Avoid Extra Charges?
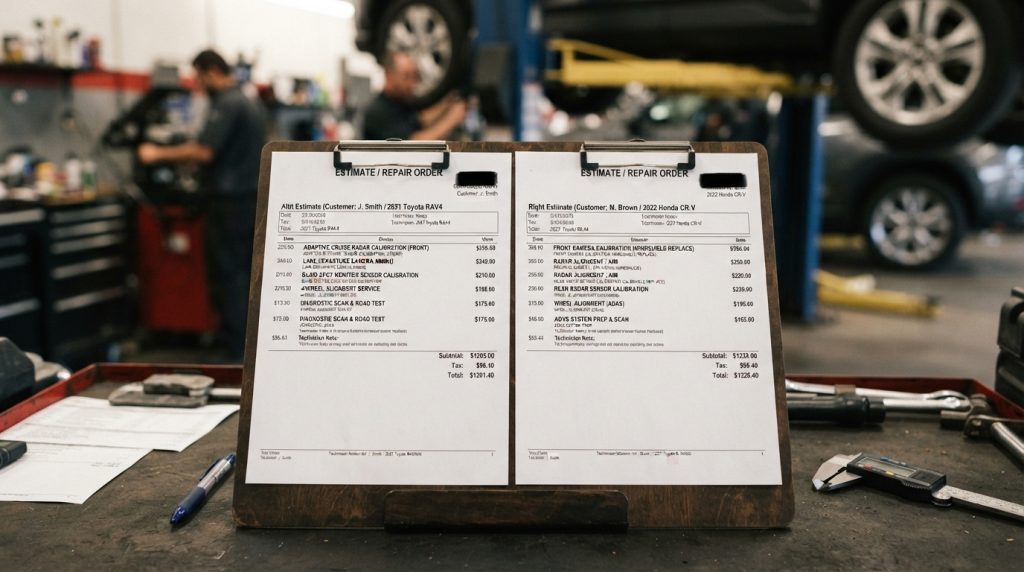
Two estimates are comparable only after you confirm they include the same operations and parts. Match each charge to the actual work, not just to a feature name.
A dashboard feature count does not equal a count of separate calibrations. Several driving functions can share sensor inputs, so one operation may relate to more than one feature.
Match each charge to hardware and procedure
Ask the shop to map each identified hardware item to its functions, required procedure, and billing line. That detail can show whether two line items cover separate work or overlap.
| Estimate item | What it covers | What to ask |
|---|---|---|
| Pre-scan | Checked modules and findings | Which modules and results? |
| Calibration or aiming | Identified system and required operation | Static, dynamic, or both? What is included? |
| Alignment | Prerequisite or separate wheel work | Is it required? What findings support it? |
| Replacement part | Installed hardware, not calibration labor | What part number and separate price? |
Scans, setup, alignment, parts, and verification may appear as separate charges. Ask which items the shop includes, bills extra, or adds only under certain conditions.
Compare the full amount due
Check the full payable amount before you approve work, not only the calibration line. Fees, tax, credits, and separate repair charges can change what you owe.
Use this five-point check when you review each estimate:
- Confirm the VIN and repair event.
- Identify the affected hardware.
- Record each required operation.
- Mark scans, setup, alignment, parts, and verification as included, extra, or conditional.
- Confirm fees, tax, credits, and total payable before approval.
A careful comparison gives you a clearer scope, but a prerequisite or operating condition can still change the job after it starts.
What Can Delay a Calibration or Add Work?
A calibration estimate can change if the vehicle is not ready for the required procedure. Prerequisites vary by application, so the shop should explain them for your vehicle.
Ask for the requirement and the findings before approving added work. Some vehicles need alignment first, while others may need repair to a damaged sensor bracket or mount.
Prerequisite repairs and alignment
An alignment may be a prerequisite in some applications, but it is not part of every calibration. A bent bracket or damaged mount may also affect sensor position and need repair first.
Ask the shop to name the OEM requirement and show what it found. You can then see whether the added work supports the procedure or appears as a separate repair.
Do not approve an extra charge without a clear reason and price. Ask whether the finding changes the calibration scope or adds a different service.
Setup conditions and incomplete attempts
Static calibration needs controlled space and measured target placement. Room, vehicle position, and target distance can affect whether the technician can set up the procedure correctly.
Dynamic procedures may depend on a suitable service drive and road conditions, including weather. Some applications require static work before dynamic work, which can add steps to the appointment.
A failed or incomplete attempt does not count as documented completion. Ask why the procedure stopped, what corrective step the shop proposes, whether the charge changes, and when it needs your approval.
There is no dependable universal completion time. The shop should estimate time from your vehicle, required procedure, prerequisites, and current conditions.
With those factors in mind, have a few vehicle and glass details ready when you request a local estimate.
What Should You Have Ready Before Calling a Local Glass Shop?
A clear description of your vehicle and glass damage makes the first estimate conversation more useful. Specific details help the shop understand the repair and the parts near the damaged glass.
Have these details ready when you ask for local glass service:
- Vehicle year, make, and model
- VIN, if available
- What happened to the windshield or other glass
- Whether a camera or sensor sits near the damaged glass
- Insurer or claim details, if relevant
If you search for “ADAS calibration cost near me” or “ADAS calibration near me,” confirm what each local estimate covers. A glass repair quote and a calibration quote may describe different services.
For windshield or other glass damage, you can contact Miracle Auto Glass at Bandera Rd & Grissom or call (210) 680-2551. Ask for vehicle-specific guidance about the glass repair and any sensor near it.
Share the details above to request a useful local estimate, then decide what glass repair your vehicle needs.
Conclusion
A useful estimate connects the vehicle’s repair event to the specific work required. Compare the identified hardware and OEM procedure, not the number of dashboard features.
Before work proceeds, clarify the full amount due and how the shop will document completion. That gives you a clear record of the repair and calibration work tied to your vehicle’s safety.
If your windshield or other glass is damaged, hire Miracle Auto Glass to fix it.