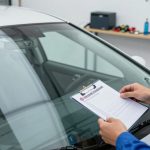
Why a Lifetime Warranty Matters for Auto Glass Repairs

How to Inspect Your Windshield for Hidden Damage
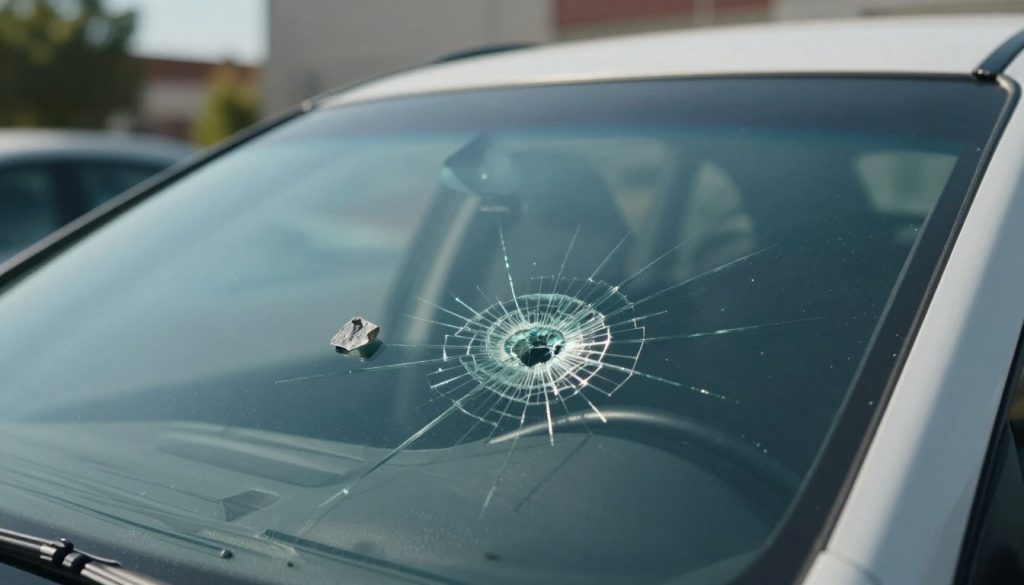
Have you ever wondered whether a small hit to your glass needs a quick fix or a full replacement?
The answer matters because a small issue can grow into big trouble on U.S. roads. You encounter hazards on highways, near construction zones, and behind gravel trucks. These impacts create a common type of damage that can affect your safety and visibility.
This guide helps you decide. You’ll learn what a typical rock chip is, why it happens, and the main factors that decide whether a DIY kit will do or if you should call a pro. We’ll look at size, crack length, location, and whether the flaw is spreading.
Along the way, we explain basic DIY steps, the limits of at-home fixes, and what replacement involves. If you want the job done quickly and correctly, consider Miracle Auto Glass as a trusted option — especially for borderline cases. We’ll also touch on how insurance sometimes helps with costs in the United States.
Key Takeaways
- Small hits are common in everyday U.S. driving and can worsen if ignored.
- Decide between DIY kit use or calling a pro by checking size, length, and location.
- Safety and clear visibility should guide your choice.
- Miracle Auto Glass is a reliable option when you need fast, correct service.
- Insurance may cover some costs; learn the basics later in the article.
Why you should act fast when you notice a windshield chip
Small glass flaws often get worse quickly. Left alone, a minor mark can stretch into a long crack and force a full replacement. Addressing the issue early saves money and keeps your view clear.
How chips and cracks grow over time
Temperature swings, road vibration, and everyday driving stress can pull a tiny flaw into a longer crack. Over time this increases the odds you’ll need a full replacement.
Safety and visibility risks while you drive
Your glass is part of your car’s safety system. A marred surface reduces visibility and can distract you — your eyes drift toward defects, not the road. That makes even a small chip a real safety concern.
Why moisture and washing can make damage worse
Water can creep into the break and stop resin from bonding. That makes fixes harder and lets cracks spread faster. Washing with high pressure or cold water can accelerate that growth.
- Act quickly: early fixes are cheaper and more likely to restore a smooth surface.
- If you’re unsure whether the flaw is stable, Miracle Auto Glass can inspect it and advise whether repair is still an option.
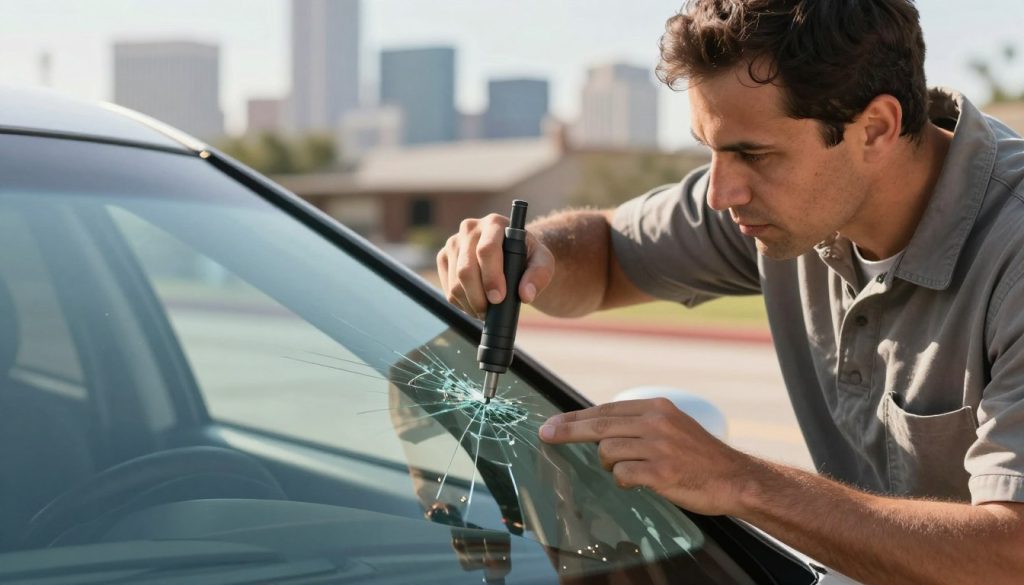
How to decide between repair and replacement
A fast, visual assessment helps you choose the right path: a home fix, a professional repair, or full replacement. Start by measuring the mark and noting its location on your glass. Small, central flaws often respond well to at-home kits. Larger or edge damage usually needs pro attention.
How big is too big: chips larger than a quarter
If the chip is bigger than a quarter, treat it as beyond most DIY kits. That size usually requires a professional evaluation to prevent spreading and preserve safety.
Crack length guideline: more than three inches
A crack longer than three inches generally needs pro help. DIY attempts rarely stabilize long fractures and can leave trapped air or poor clarity.
Why repairing is often better than replacing when it’s still possible
When a fix can stop the damage and restore clarity, choose repair. It usually preserves the original factory seal and costs less than full replacement.
Location matters: damage in your sight line, near the edges, or under stress makes replacement more likely. Professional shops follow manufacturer instructions and handle borderline cases better than DIY attempts.
- Rule of thumb: if larger than a quarter, seek a pro.
- If the crack is over three inches, plan for professional help.
- When unsure or near the size limits, contact Miracle Auto Glass for a confident recommendation.
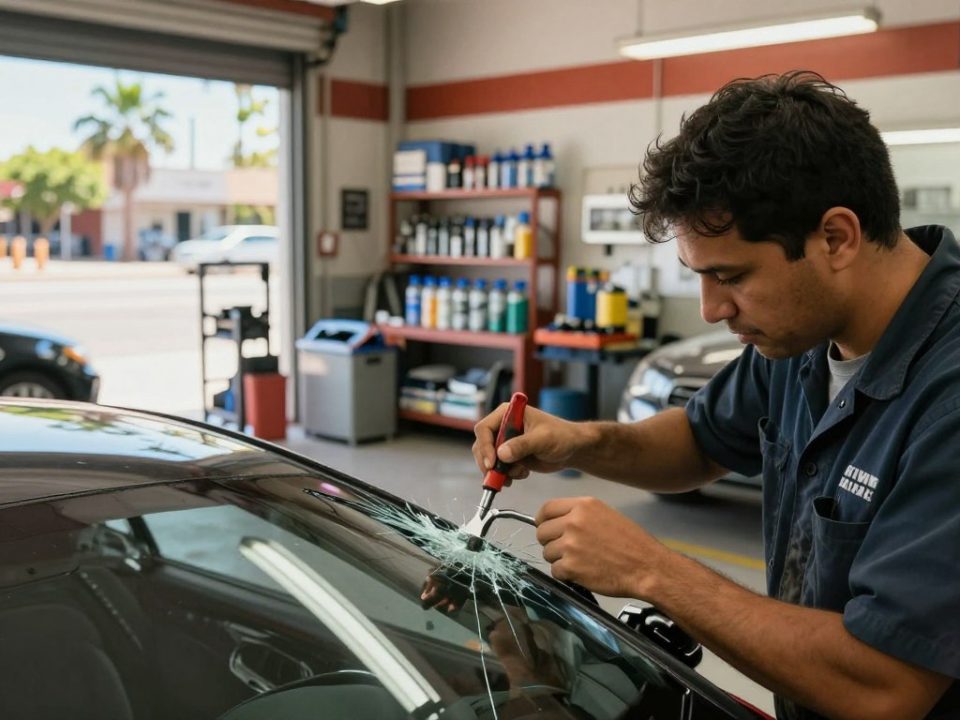
rock chip windshield repair: what you can fix with a DIY repair kit
Many minor glass defects are treatable with a good kit — when size and location allow. A DIY approach works when damage is small, contained, and free of contamination. The goal is to fill the break with resin so the surface regains strength and clarity.

Common patterns and what “repairable” means
Typical patterns include round bulls-eye marks, small star breaks, or single-point pits. Repairable damage usually means the flaw is under the size limit for kits and has not spread into long cracks.
When a kit is the right fit — and when to call a pro
A kit is a good choice if the mark is small, clean, and you can follow the guide precisely. Results depend on temperature, cleanliness, and avoiding trapped air bubbles.
- If legs are spreading, the crack keeps growing, or damage sits near the edge, contact Miracle Auto Glass for professional service.
- Choose a pro when you want higher confidence, faster service, or when a borderline case risks safety.
What to gather before you start your windshield repair
Starting with the correct tools and fresh resin saves time and helps you avoid costly mistakes. Prepare upfront so you do not stop midway through the application.
Choose the right kit and check resin shelf life
Pick a reputable repair kit and inspect the resin or epoxy tube. Epoxy older than six months can cure poorly and leave a weak fill.
Make sure the tube shows no expiration and that the resin flows when you squeeze gently.
Tools and prep materials to gather
- Rubbing alcohol and a clean microfiber cloth to clean the area.
- A pin or thumbtack to remove loose shards.
- A razor blade for finishing and scraping excess resin.
- The kit’s pedestal/tube, resin syringe, and a curing strip for the final step.
Best conditions for adhesion and curing
Work in warm daylight when possible: UV light speeds curing and warmth improves resin flow and adhesion.
Dry the chip area completely before you begin. If it recently rained, dry trapped moisture first; wet damage prevents proper bonding.
Tip: If you cannot control temperature, light, or tools, Miracle Auto Glass can perform a faster, cleaner service using professional-grade materials and process control.
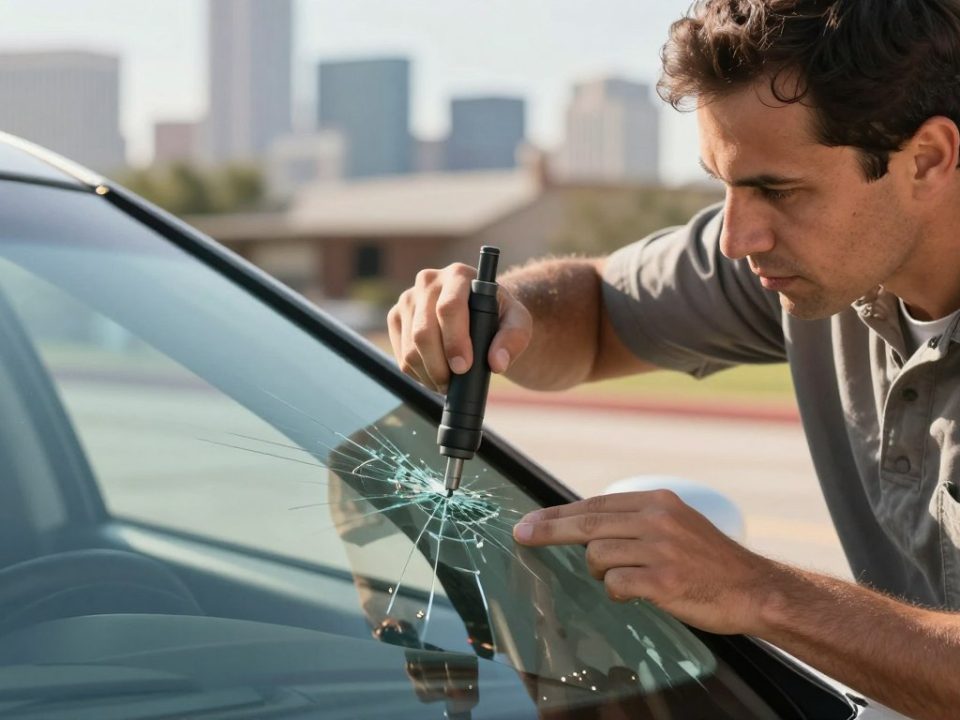
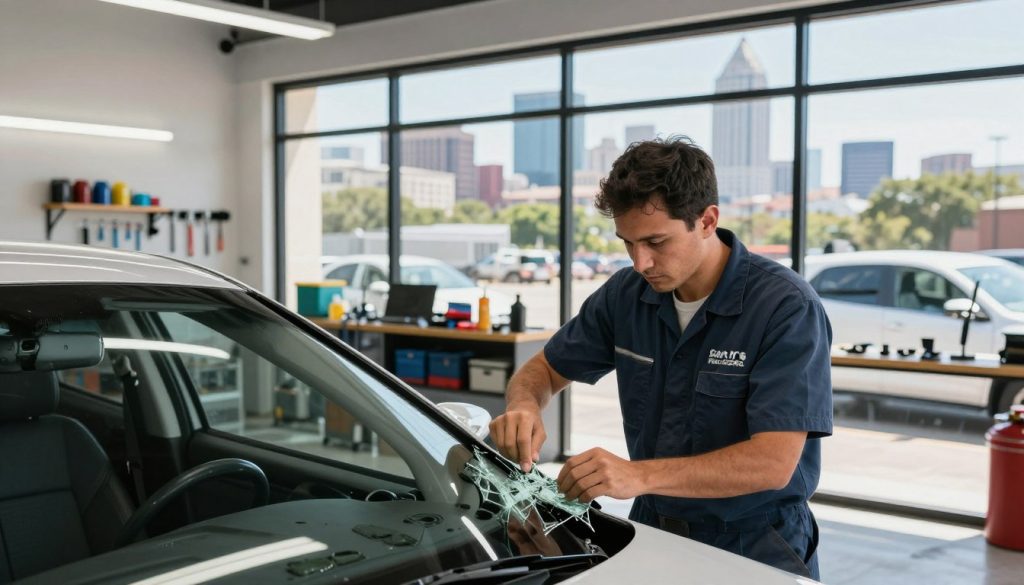
DIY windshield chip repair steps using a repair kit
Follow this concise workflow so you know the exact order of steps before you open the resin.
-
Clean the chip and surrounding glass
Use rubbing alcohol on a microfiber cloth to clean the area. Do not spray cleaner into the damage; that can trap liquid inside the crack.
-
Remove loose glass shards carefully
Use a pin or thumbtack to dislodge tiny shards. This lets the resin penetrate the chip crack instead of sitting on debris.
-
Apply the adhesive patch and align the pedestal/tube
Center the adhesive patch over the mark, then attach the plastic tube so the seal is tight during the next phases.
-
Load resin and pull a vacuum with the syringe plunger
Fill the tube, insert the syringe, and pull the plunger to draw air and bubbles out. Wait until bubbles slow or stop—this may take several minutes per the kit instructions.
-
Reinsert the syringe and push resin into the crack
Remove syringe, then reinsert and push the plunger to force resin into the void. Watch from inside the vehicle to see the fill progress.
-
Tap the glass and avoid blowing the seal
Gently tap near the repair to free trapped air. Do not over-compress; too much force can blow the adhesive seal and waste resin.
-
Let the resin cure and finish the surface
Allow curing for the full time listed in your instructions. Add a finishing drop, place the curing strip at an angle, and squeegee air out with a razor.
-
Remove the strip and polish
Scrape the perimeter and twist the strip off rather than pulling. Scrape excess resin perpendicular to the glass and polish for clarity.
| Phase | Action | Timing |
|---|---|---|
| Prep | Clean and remove shards | 5–10 minutes |
| Vacuum | Pull plunger to remove bubbles | 1–10 minutes |
| Pressure | Push resin into crack | 1–5 minutes |
| Cure & Finish | Apply strip, cure, scrape, polish | As kit specifies (minutes to hours) |
Note: If the fill looks cloudy, does not bond, or the crack keeps spreading, stop and call Miracle Auto Glass. A pro can assess whether professional service is safer than more DIY attempts.
When professional windshield repair is the safer choice
Not all fixes belong in the driveway; some require trained hands and controlled conditions. If the mark grows, has multiple legs, or sits near an edge, stop doing DIY and call a pro right away.

Signs you should call a professional
- Large chips or any crack longer than three inches.
- Multiple spreading fractures or damage that keeps growing.
- Damage in your primary sight line or at the glass edge.
Why professional work is safer and more reliable
Technicians control contamination, moisture, and resin quality so fills bond correctly. That lowers the chance you waste time on a failed DIY attempt that still needs replacement.
Mobile service can come to your vehicle at home or work. That reduces downtime and cuts the risk the crack spreads while you wait.
| Benefit | What it means | Result |
|---|---|---|
| Controlled environment | Dry, clean surface and proper temperature | Stronger, clearer fills |
| Experienced tech | Correct resin and technique | Fewer repeat repairs |
| Mobile service | Work at your location | Less downtime for your vehicle |
Make sure you prioritize clear vision and safety over experimenting. For fast, correct service, consider Miracle Auto Glass — a straightforward option when you want the job done right the first time.
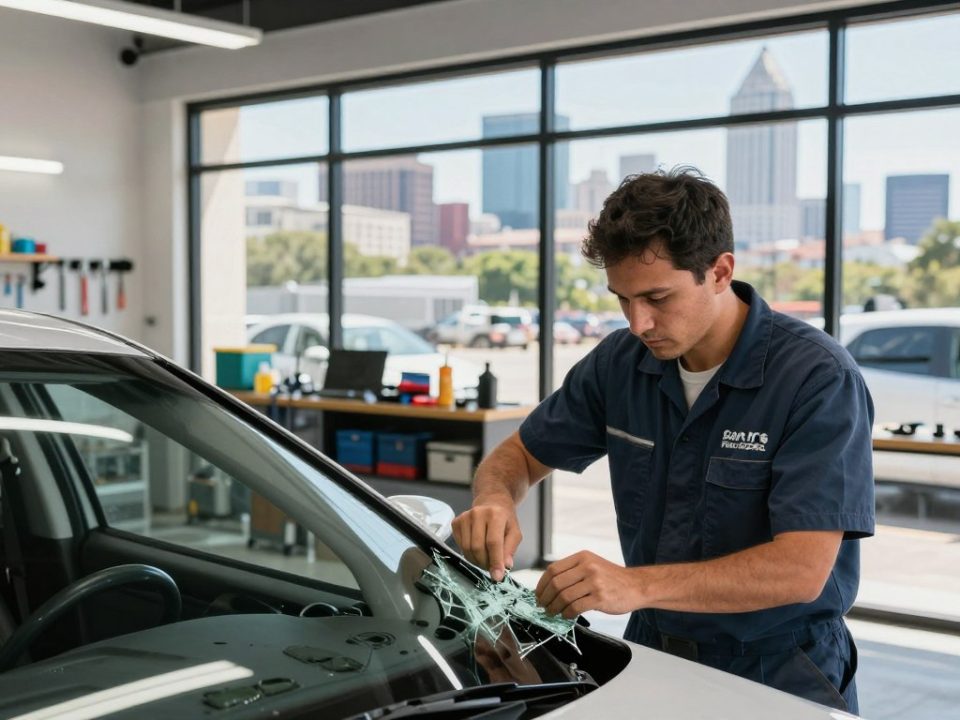
When windshield replacement is required and what to expect
Some damage grows until a full glass swap is the only way to restore proper strength and visibility. When cracks spread past repair limits, or when safety and optics cannot be fixed, you need a full replacement.
Why a full replacement may be necessary once damage grows
If a crack runs to the edge, has many legs, or compromises structural support, a repair won’t restore original strength. Full replacement removes the weakened panel and installs new glass with factory-grade bonding.
ADAS calibration after replacement: restoring camera-based safety features to OEM specs
Modern vehicles often have camera systems mounted to the glass. After replacement, those cameras must be calibrated so lane-keeping, forward-collision alerts, and other systems work correctly.
Calibration matters: correct alignment and software checks return safety features to factory standards and avoid warning lights or misaligned assists.
- Replacement is more involved than a repair: removal, bonding, and specified cure time.
- Calibration ensures your vehicle’s advanced systems perform per manufacturer instructions.
- Choose a shop that handles both replacement and ADAS calibration to save you trips and risk.
| When to Replace | Why | What to Expect |
|---|---|---|
| Crack reaches edge or spreads | Structural weakness and spreading | Full removal and new glass installation |
| Large or multiple long cracks | Repair will not restore clarity or strength | Bonding, cure time, and finish work |
| Vehicle has windshield-mounted ADAS | Camera alignment affects safety systems | Post-install calibration to OEM specs |
| Visible distortion in sight line | Impaired visibility and safety | Replace and recalibrate for clear vision |
Miracle Auto Glass can manage full replacement and arrange ADAS calibration so your vehicle returns to safe, factory-level performance. That ensures the job is finished correctly and on time.
Insurance and claims basics for windshield chip repair in the United States
Before you call a shop, check your coverage—how insurers treat glass claims varies by policy and state. With comprehensive coverage, many minor glass fixes are covered and the shop can submit the bill and handle paperwork for you.
How coverage and claims usually work
Most insurers cover small glass damage under comprehensive policies. That often means little or no out-of-pocket cost when the glass shop bills the carrier directly.
Why some drivers pay out of pocket
Even covered claims can appear on your record. Some drivers prefer to pay for a quick fix to avoid a possible premium impact later.
Your rights and how to avoid scams
You have the right to choose your shop. Do not feel pressured to use the carrier’s suggested vendor.
- Watch for high-pressure sales or unclear pricing.
- Avoid shops that push unnecessary replacement when a simple fix will do.
- Follow NICB guidance: verify credentials and get written estimates.
| Claim Type | Common Outcome | What to Check |
|---|---|---|
| Minor glass fix | Often covered with no deductible | Shop can bill insurer |
| Full replacement | May trigger deductible | Confirm coverage rules |
| Out-of-pocket | No claim on record | May avoid premium changes |
Florida note: In Florida, insurers may be required to pay full cost for glass fixes or replacement under comprehensive coverage with no deductible—confirm with your carrier.
Choose Miracle Auto Glass when you want clear answers, transparent quotes, and help handling paperwork. We’ll explain whether a repair or replacement fits your situation and help you avoid scams.
Conclusion
Small glass marks often get worse faster than you expect. Act quickly: measure the size and length of the crack, then decide if a home kit will stop spreading or if professional work is needed.
Make sure moisture, heavy washing, and road stress don’t turn a fixable flaw into a full replacement. DIY kits can work for tiny, contained breaks when you follow instructions, control conditions, and cure the resin fully.
When damage is larger, spreading, or in a critical area that affects safety, choose professional service. For a trusted inspection, clear advice, and fast service, hire Miracle Auto Glass — they handle assessment, repair, and complete replacement if needed. Get a fast, trusted inspection at fast, trusted service.