
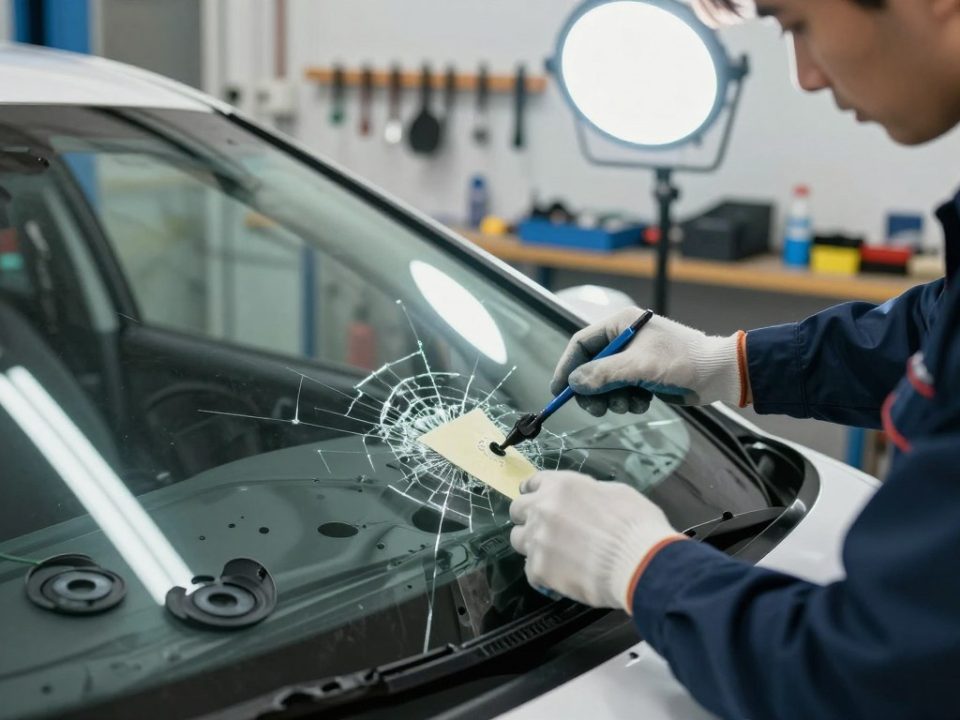
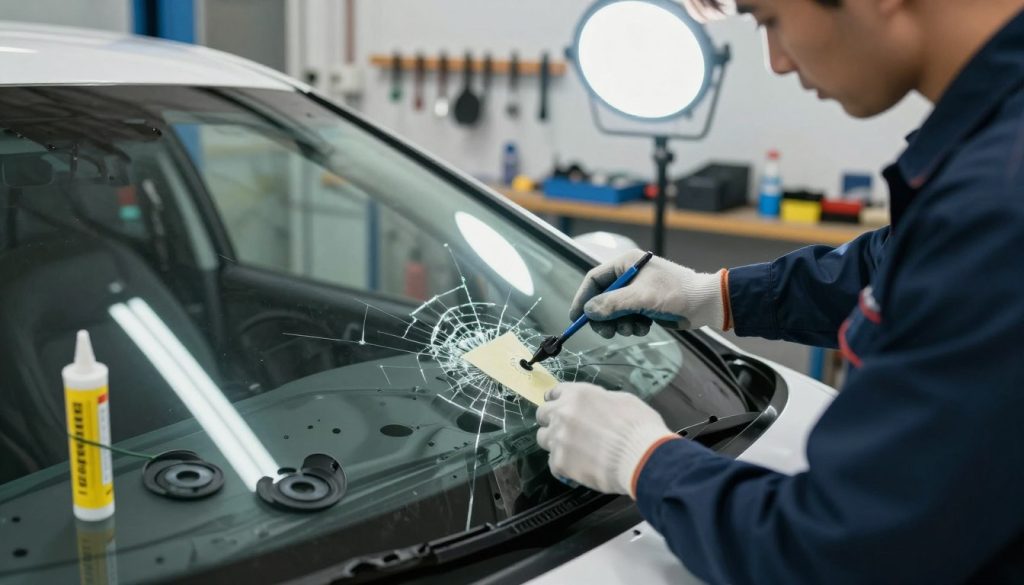
What Hail Damage Can Do to Your Windshield in San Antonio
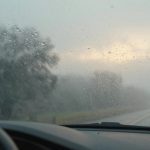
How to Prevent Foggy Car Windows in Humid Texas Weather
Want to know why your car glass still shows smears after a hard wipe? The answer will change how you approach every wash.
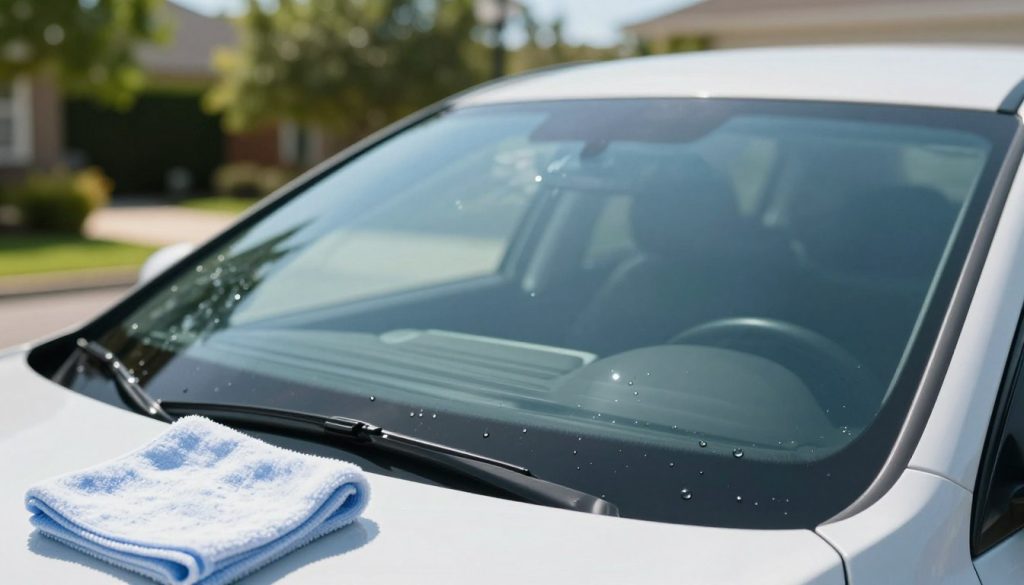
Streak-free means no haze, no smears, and no residue that flashes in sunlight. You can reach near “invisible glass” clarity by using the right time, the right towels, and a controlled amount of product instead of over-spraying.
This guide focuses on technique: pick a shaded spot, use dedicated microfiber or glass towels, avoid ammonia-based cleaners, and finish with a dry buff towel. You’ll learn simple directional wipes—vertical outside and horizontal inside—so you can see which side still needs work.
If interior film resists normal passes, gentle deep-cleaning or a melamine eraser can help without scratching. And if you find chips, cracks, or pitting while you work, professional repair preserves safety and prevents further damage.
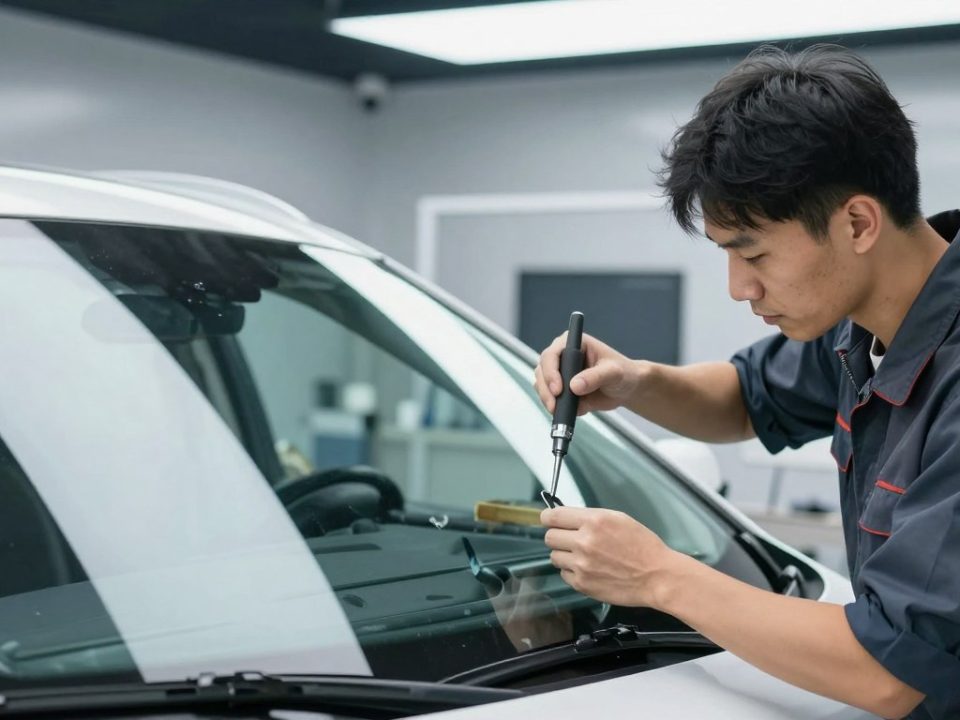
When you’re ready for a pro fix, hire Miracle Auto Glass to repair or replace any damaged auto glass.
Key Takeaways
- Streak-free means no haze, smears, or residue in sunlight.
- Technique matters more than product volume for a clean windshield.
- Use microfiber towels, ammonia-free cleaner, and directional wipes.
- Interior film may need deeper passes or a melamine eraser.
- Find chips or cracks? Call Miracle Auto Glass to protect visibility and safety.
Why streak-free windshield cleaning matters for visibility and safety
Clear glass keeps you safer by letting light behave the way it should.
A thin film on the inside of your glass acts like a diffuser. That film—often from off-gassing plastics or residue—spreads and softens bright points of light. Sunrise, sunset, and oncoming headlights can become dazzling instead of sharp.
Grime and haze bend and scatter light. They often seem minor in shade but grow distracting in bright sun. That loss of contrast reduces your ability to see lane markings, pedestrians, and debris.
How reduced clarity shortens reaction time
When you can’t clearly read the road, your reaction window shrinks. Slower recognition of hazards lowers safety and raises crash risk. A clean car windshield restores contrast so you spot trouble sooner.
Why the inside matters as much as the outside
Interior residue builds slowly and becomes a dazzling hazard even when the exterior looks fine. Treat clarity like safety equipment: it helps mirrors, driver-assist cameras, and your own vision.
- Film diffuses glare and widens bright zones.
- Grime scatters light and hides small hazards.
- Clear view boosts reaction time on long US commutes and highways.
If cleaning uncovers chips or cracks that distort your view, Miracle Auto Glass can repair or replace your glass to restore safe, distortion-free vision.
Choose the right time and place to clean your car windshield
Choose cooler hours and protected spaces to get a clearer finish every time.
Work in the early morning or late afternoon when glass is cool. In the United States, your driveway, a covered parking spot, or a garage gives the best results.
Why shade and cooler temps help: direct sun heats the glass and makes a glass cleaner flash-dry. That leaves streaky residue before you can buff it away.
Protect the job from wind and dust
Choose a sheltered spot to keep pollen, grit, and wind-blown dirt off wet surfaces. Wind can also push overspray onto dash trim or paint, adding cleanup work.
Avoid cleaning right after driving. Hot glass changes how a cleaner behaves and increases streak risk.
Simple timing strategy
- Clean the exterior first while the car is stable outside. This controls runoff and reduces re-contamination.
- Then move inside to finish, working in the same shaded spot or garage.
- Keep loose dirt away before you wipe; grit causes scratches more than the product you use.
| Best Time | Recommended Place | Why It Helps |
|---|---|---|
| Early morning | Driveway or garage | Cool glass, low wind, soft light |
| Late afternoon | Covered parking | Less direct sun, calmer air |
| Avoid right after driving | Any outside spot | Glass is hot; cleaner may evaporate unevenly |
Gather the right tools for cleaning glass without scratches
Start by gathering proper supplies so you don’t trade grime for new damage.
Skip paper towels and newspaper for routine work. They leave lint, drag grit, and can cause fine scratches on car windows. Use dedicated microfiber cloths instead.
Why waffle-weave microfiber works best
Waffle-weave towels lift and trap residue while reducing streaks. Their texture grabs oily film without smearing it across the glass.
Two-towel system and organization
Use one towel for the wet wipe and a second dry towel for buffing to a clear finish. Pick different colors so you never buff with the dirty wiping cloth.
Reach tools and dash protection
For tight top corners of the windshield inside, consider reach-and-clean tools like the Invisible Glass Reach and Clean Tool or AutoFiber-style kits. Place an absorbent towel on the dash and over vents to catch drips and protect vent channels.
- Inspect and shake out towels before each pass—trapped grit can scratch even good microfiber.
- Keep a small kit of soft cloths and a reach tool handy for inside car spots.
| Item | Why it helps | Recommended use |
|---|---|---|
| Waffle-weave microfiber | Traps grime, reduces lint | Wet wipe and initial pass |
| Dry microfiber cloth | Buffs to a clear finish | Final polish |
| Reach-and-clean tool | Access tight upper corners | Inside windshield corners |
Pick a safe glass cleaner for your windshield and interior
Pick a cleaner that protects tint and trim while still cutting oily film fast. An ammonia-free glass cleaner is the safest default for tinted windows and dash trim. It reduces the risk of drying or discoloring plastics near the glass.

Why ammonia-free matters for tinted windows and interior surfaces
Many household products contain ammonia, which can lift tint adhesive and dull interior finishes. Choose a product labeled ammonia-free to protect aftermarket tint and soft trim. Less product is better—over-spraying often leaves residue you end up chasing as streaks.
When rubbing alcohol helps with stubborn spots and smears
For isolated spots, dampen a corner of a microfiber cloth with rubbing alcohol and work gently. Keep the alcohol on the towel and avoid dripping onto plastic or fabric.
- Spot-treat only the affected area, then re-wipe the whole glass so you don’t leave a clean patch surrounded by haze.
- Always test a new cleaner in an inconspicuous area near tint edges before wider use.
| Product Choice | Why | Use |
|---|---|---|
| Ammonia-free cleaner | Protects tint and trim | Regular inside and outside passes |
| Rubbing alcohol (on cloth) | Removes sap and stubborn smears | Spot treat, then re-clean |
| Minimal product | Prevents residue and streaks | Spray onto cloth, not glass |
Pre-clean steps that prevent streaks and scratching
Begin with a dry pass so you don’t grind road grit into the surface during wet work.
Start by wiping the glass with a clean microfiber cloth to lift loose dirt and dust. This removes coarse particles on the outside and fine dust inside the car that can scratch when dragged during a wet wipe.
Spray your cleaner onto the cloth instead of the glass. That prevents overspray onto the dash, infotainment screens, and trim.
Spraying directly can push product into seams and edges where it later drips and forms streaks you might miss. A controlled damp wipe uses far less product and gives you better control.
- Work in three deliberate steps: dry wipe, controlled damp wipe, then dry buff.
- Fold your towel into quarters and flip to a clean face as grime loads up to avoid transferring residue.
- Keep sprays away from electronics and vent openings to protect interior components.
| Step | Why it helps | Action |
|---|---|---|
| Dry wipe | Removes loose grit | Use clean microfiber |
| Spray on cloth | Prevents overspray | Apply cleaner to towel, not glass |
| Dry buff | Removes residue | Finish with a dry microfiber face |
Next: you’ll use different wipe directions on the outside versus the inside so you can tell which side needs another pass.
How to clean the outside windshield without streaks
Begin on the exterior to set a clean baseline before you move inside. Starting outside is the easiest way to remove road film and see whether streaks come from the exterior or the interior.
Use vertical passes to find remaining streaks fast. Apply your cleaner lightly to a folded microfiber and wipe up-and-down. Vertical motion makes any leftover lines obvious in sunlight.
Work top to bottom to control runoff. Start at the roof line and move downward so drips travel predictably. This prevents missed upper edges and drip trails near the wipers.
- Begin with the exterior: it sets a baseline before you clean the inside of your car.
- Spray the cleaner on the towel, not the glass, and use vertical passes for the best way to spot streaks.
- Switch to a second dry towel to buff immediately and remove residue before it dries.
- Pay special attention to the perimeter and lower edge where wipers rest—road film collects there.
- Keep towels clean and use light pressure; avoid dragging grit that can scratch the glass.
| Action | Why it helps | Result |
|---|---|---|
| Vertical up-and-down passes | Makes exterior streaks visible | Easy re-buffing and faster correction |
| Top-to-bottom workflow | Controls runoff and prevents missed spots | No drip trails near wipers or edges |
| Use separate dry towel | Removes residue before it sets | Clear, glare-free view for driving |
If you later see vertical streaks in bright light, they likely come from the outside and need a quick re-buff. A clean exterior improves contrast and helps your vision while driving the car.
How to clean the inside windshield without streaks
Start inside by positioning yourself so the steering wheel doesn’t block your reach. Sit on the passenger side to access the center and the driver-side upper glass without awkward twisting.
Better reach and spray control
Sit low and close enough to reach the top corners comfortably. Spray your cleaner onto a folded microfiber cloth, not the glass, to prevent drips on the dash and electronics.
Horizontal passes to separate streak sources
Wipe side-to-side in even, overlapping horizontal passes from top to bottom. This directional choice helps you diagnose any residual haze: if streaks run horizontally, they come from the inside; vertical streaks point to the exterior.
Use circular motion only for spots
When you hit a fingerprint or a small smear, use a gentle circular motion with a damp corner of your microfiber cloth to lift the grime.
Then return immediately to horizontal passes to even out the finish.
Finish by buffing and towel management
Always end with a clean, dry microfiber towel and buff in the same horizontal direction. Flip or refold towels often; interior film loads cloths fast and can redeposit oils.
Take short breaks if you feel strained—controlled, light pressure beats force when you want a streak-free result.
| Action | Why it helps | Quick result |
|---|---|---|
| Sit on passenger side | Better reach without steering-wheel obstruction | Access to top corners and center glass |
| Spray on microfiber cloth | Prevents overspray and dashboard drips | Cleaner, safer interior work |
| Horizontal passes | Distinguishes inside vs. outside streaks | Easy diagnosis and even finish |
| Spot circular motion | Targets fingerprints without overworking the glass | Local grime removed, then leveled |
| Dry buff with fresh towel | Removes residue instead of letting it haze | Clear, glare-free view |
Windshield cleaning tips for removing interior film and vapor residue
Start small: work one narrow area at a time so you can see if the haze lifts or just spreads.
What the greasy haze is: a bonded mix of off-gassing from plastics, human vapor residue, smoke, and dust. Over time this film clings to the inside car glass and looks fine—until low sun turns it into a blinding glare.
Deep-clean plan: use less product and more controlled passes. Spray your cleaner onto a folded microfiber, wipe a small section, then let it dry briefly. That pause shows whether you removed film or merely moved it.

Melamine eraser option: a lightly damp melamine pad can cut stubborn film. Work gently, avoid dash contact, and never use heavy pressure that could damage trim.
- Flip to a fresh towel face often to prevent re-smearing.
- Lay a towel over the dash and vents to catch drips and protect trim.
- Wash hands or wear nitrile gloves to avoid transferring skin oils back onto the glass.
Final checkpoint: once the film is gone, finish with a clean, dry microfiber buff to restore uniform clarity. This step locks in a streak-free finish and helps your visibility on bright drives.
Fixing stubborn contamination on auto glass
Tough residues like tree sap, bug splatter, and baked-on road grime sometimes resist a standard pass. These spots often need a focused solution so the rest of your glass stays uniform.
Tree sap, bugs, and road grime: when alcohol on a cloth can help
Apply a small amount of rubbing alcohol to a clean cloth—never spray directly onto the glass. Work the cloth gently on the spot until the residue loosens.
Use light pressure and short passes. Aggressive scrubbing can grind grit and make micro-scratches on the car surface.
Spot-treat first, then re-clean the whole window to avoid patchy clarity
After the spot lifts, re-clean the entire outside surface with your regular cleaner and a fresh microfiber. This removes edged patches and gives consistent clarity across the whole window.
- Test alcohol in an inconspicuous area first to protect tint and trim.
- Keep a towel over the dash and trim to catch any drips near edges.
- If you park under trees or drive through bugs often, clean more frequently to prevent heavy buildup.
| Contaminant | Spot method | Follow-up |
|---|---|---|
| Tree sap | Rubbing alcohol on cloth, gentle roll motion | Re-clean whole glass, dry buff |
| Bug splatter | Soften with alcohol, then wipe with cleaner | Full outside pass to match finish |
| Road grime | Pre-wet cloth with cleaner; spot alcohol for stubborn areas | Finish with uniform buff across window |
Final inspection techniques to catch streaks you can’t see at first
Finish every job with a slow, methodical inspection so invisible flaws reveal themselves.
Check from multiple positions: step outside and view the glass from arm’s length. Then sit in the driver’s seat and scan across the surface. Some haze appears only from one angle.
Lighting and timing
Inspect in shade, under overhead light, and in oblique sunlight. Side light exposes film and streaks better than flat light.
Let it dry before you judge
Wait a short time after buffing. Some visible streaking fades as product flashes off. Give it a minute before deciding on more work.
- If streaks run vertical, they likely come from the outside; horizontal streaks point to the interior.
- Often a single dry buff with a fresh towel restores visibility—avoid overdoing the product.
- Make this inspection part of your routine so film never needs deep effort later.
| Check | What to use | When to act |
|---|---|---|
| Outside view | Natural oblique sunlight | Immediately after buffing |
| Driver-seat view | Low-angle look toward horizon | If glare or haze still visible |
| Dry wait | Clean dry microfiber | After 60–90 seconds for evaporation |
Prevent streaks and protect your windshield between cleanings
A few simple routines can stop streaks before they start and protect your view.
Wiper condition is non-negotiable. Worn blades drag grit and contamination across glass, leave persistent streaks, and can eventually cause micro-scratches. Inspect blades at least every three months and replace them if they skip, chatter, squeak, or leave thin lines.
Park in shade or use a sun protector to cut heat and reduce baked-on grime. Heat accelerates interior off-gassing that builds film on your vehicle’s glass and speeds adhesion of dust and pollutants.
Consider a water-repellent coating as an optional upgrade. These treatments make water bead and slide, which improves wet-weather visibility and reduces how hard road grime sticks. They do not replace regular maintenance, but they lower frequency and effort of future wipe-downs.
Adopt a quick between-cleanings habit: a light wipe with a clean microfiber and minimal glass cleaner removes fresh deposits without building residue. Consistent care also helps you spot chips or damage earlier—so repairs happen before problems grow.
- Replace blades at the first sign of skipping or streaking.
- Shade parking or a sun shield reduces heat-related film and grime.
- Use repellents to reduce wet-weather grime; still re-clean periodically.
- Short touch-ups save you time and prolong the life of your vehicle’s glass.
| Preventive Action | Why it helps | When to act | Quick result |
|---|---|---|---|
| Replace wiper blades | Stops dragging grit and streaks | Every 6–12 months or when skipping | Safer, scratch-free passes |
| Park in shade / use sun protector | Limits heat bake and interior off-gassing | Whenever available during daytime | Less film buildup and easier wipes |
| Apply water-repellent coating | Makes water bead and shed quickly | As an optional seasonal upgrade | Improved wet-weather visibility |
| Light between-cleaning wipe | Removes fresh deposits without residue | Weekly or after dusty drives | Faster full cleans and clearer view |
For a step-by-step refresher on how to keep a pristine view and extend the life of your blades and coatings, see the best way to clean your windshield.
Conclusion
Conclusion
Close the job with a simple, repeatable routine so clarity becomes routine.
Work in shade, start with a dry wipe, spray product onto a towel, and use a two-towel wipe-and-buff method for a crisp result. Use vertical passes outside and horizontal passes inside so you can quickly tell where any residue comes from.
Interior film is common. Remove it with multiple controlled passes rather than forceful scrubs. Keep the process gentle and consistent to protect the glass and keep long-term visibility high.
If you find chips, cracks, or damage that a clean inside pass won’t fix, hire Miracle Auto Glass to repair or replace your auto glass and restore safe, clear vision. Learn more at Miracle Auto Glass guides.
